Raymii.org

Quis custodiet ipsos custodes?Home | About | All pages | Cluster Status | RSS Feed
Personal Wireguard VPN on a Freedombox with Debian
Published: 03-02-2020 | Author: Remy van Elst | Text only version of this article
❗ This post is over five years old. It may no longer be up to date. Opinions may have changed.
Table of Contents
This guide will show you how to set up a personal Wireguard VPN server on Debian or Ubuntu with Freedombox. Freedombox will be used to manage the VPN software, firewall and users. Wireguard is a relatively new VPN built in to the linux kernel. Freedombox is a long running project under the Debian umbrella providing a private server for non experts with focus on user freedom, ease of use and privacy.
Combined, those two make a great pair. In the past I've written many articles on how to setup your own personal VPN server, but those all required manual setup and maintenance. With freedombox, the updates are automatic and the management is hidden away behind a convenient web interface.
This personal VPN server can be used to secure your internet connection when on the road but also to get secure access to your home network while away.
I have this setup running at home on a Freedombox Pioneer edition, very nice hardware supported and endorsed by the Freedombox Foundation.
If you want to setup everything by hand and not use a web ui, the debian wiki has a great guide. If you want to install Freedombox on your Pioneer, read this.
Recently I removed all Google Ads from this site due to their invasive tracking, as well as Google Analytics. Please, if you found this content useful, consider a small donation using any of the options below. It means the world to me if you show your appreciation and you'll help pay the server costs:
GitHub Sponsorship
PCBWay referral link (You get $5, I get $20 after you've placed an order)
Digital Ocea referral link ($200 credit for 60 days. Spend $25 after your credit expires and I'll get $25!)
Quoting the Freedombox website:
FreedomBox is a private server for non-experts: it lets you install and configure server applications with only a few clicks. It runs on cheap hardware of your choice, uses your internet connection and power, and is under your control.
Quoting the Wireguard website:
WireGuard is an extremely simple yet fast and modern VPN that utilizes state-of-the-art cryptography. It aims to be faster, simpler, leaner, and more useful than IPsec, while avoiding the massive headache. It intends to be considerably more performant than OpenVPN. WireGuard is designed as a general purpose VPN for running on embedded interfaces and super computers alike, fit for many different circumstances. Initially released for the Linux kernel, it is now cross-platform (Windows, macOS, BSD, iOS, Android) and widely deployable. It is currently under heavy development, but already it might be regarded as the most secure, easiest to use, and simplest VPN solution in the industry.
Freedombox has support for Wireguard since version 20.1. This includes a grahpical interface to setup and manage Wireguard including user management.
This guide will assume you use a new server which is not in use for anything
else. I use Debian in this guide and include instructions on upgrading to
Debian testing, but it should work on a recent Ubuntu as well. At the time of
writing the wireguard package is available only in Ubuntu 19.10 and up (including
the upcoming 20.04 LTS.) On Debian the current stable (10/buster) also does
not contain wireguard, but testing and unstable do have it.
Since this is still all relatively new, you might experience issues. OpenVPN is a stable alternative, if you want to go the Freedombox route, that will work on Debian Stable (10) and Ubuntu LTS (18.04).
The guide first lets you install Freedombox, after that update the entire distro to
testing and finaly install wireguard. This order makes sure that Freedombox is
correctly installed and working before we go into uncharted areas (debian testing).
Install Freedombox
The installation of Freedombox is very easy because all the software is in the debian repositories. I do assume you use a new, clean server for this since Freedombox makes many changes to your system including network, firewall and user management.
Use the following command to install Freedombox and go get a cup of tea or coffee, it might take a while:
DEBIAN_FRONTEND=noninteractive apt-get install ssl-cert freedombox
In my other guide on installing Freedombox on the Pioneer Olimex ARM board I figured out that the extra package is required to start up the webserver.
Navigate to the IP and domainname of your server and follow the instructions.
The web interface is available via https://your-server/plinth and will ask
for a secret. That secret can be found with the following command:
cat /var/lib/plinth/firstboot-wizard-secret
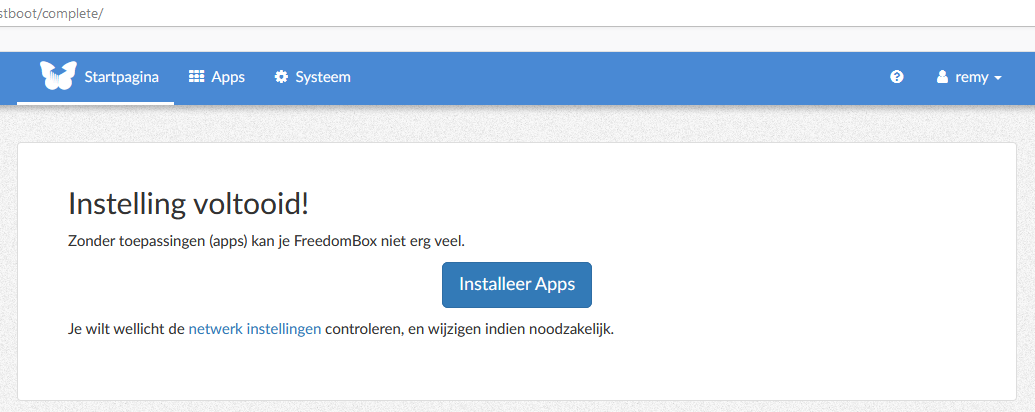
When the installation and user setup are finished, you are greeted with a nice screen suggesting to install apps. Wait a little bit since we're first going to upgrade the operating system.
Upgrading debian 10 to testing
The current debian 10 version does not have the wireguard package. It is in
debian testing and in unstable. For this guide I'll assume you want to experiment
a bit thus we will upgrade a 'normal' debian 10 instance to debian testing.
I do not recommend doing this to an existing system. Create a [new VPS][99] over at Digital Ocean (referal link) to test this. I do only have positive experiences with running Debian testing, but generally I know what I'm doing with unstable linux systems. If you need a stable system, wait until wireguard is in Debian.
If you're running Ubuntu 19.10 or higher, the wireguard package is available and you must make sure that you have Freedombox 20.1 or higher.
Create a backup of your sources.list file:
cp /etc/apt/sources.list /etc/apt/sources.list.bak
Overwrite your sources.list file to only include the testing repositories:
echo 'deb http://deb.debian.org/debian/ testing main contrib non-free' > /etc/apt/sources.list
echo 'deb http://deb.debian.org/debian/ testing-updates main contrib non-free' >> /etc/apt/sources.list
echo 'deb http://deb.debian.org/debian-security testing-security main' >> /etc/apt/sources.list
Upgrade to Debian testing:
apt-get update
DEBIAN_FRONTEND=noninteractive apt-get -y dist-upgrade
Remove any leftovers:
DEBIAN_FRONTEND=noninteractive apt-get autoremove
Reboot your system:
reboot
Setup Wireguard via Freedombox
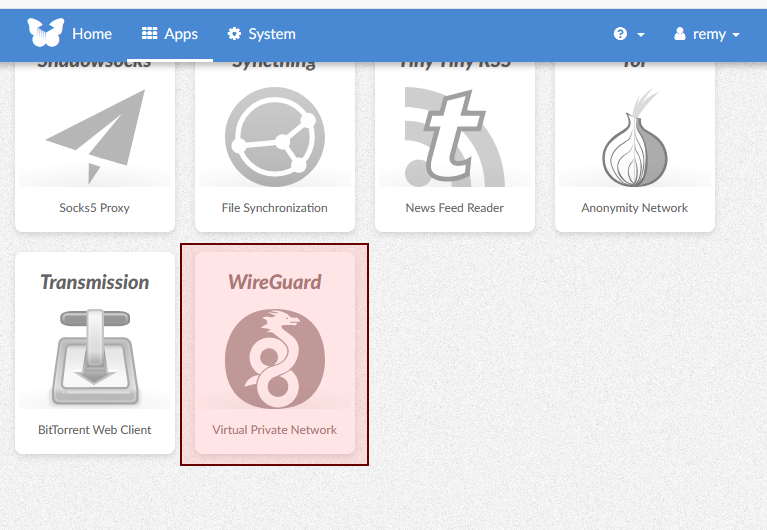
Once the update is finished, login to your freedombox again and open the Apps
page via the menu. Scroll down and the wireguard button should be visible:
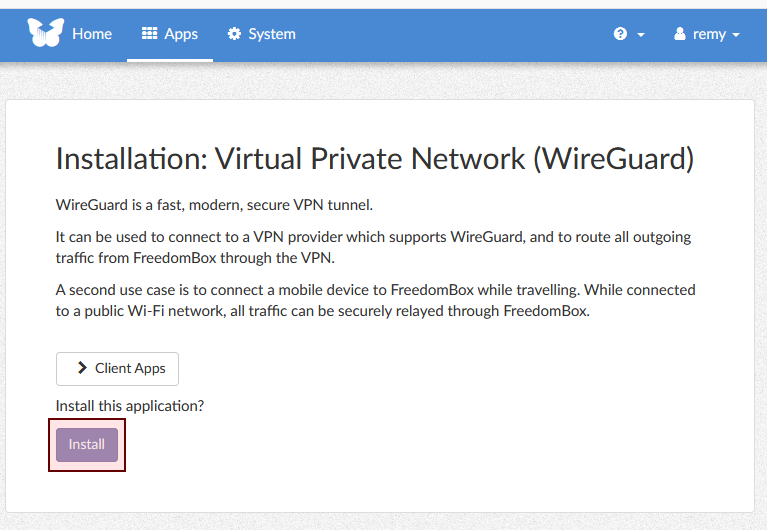
Click the button. On the next page, click the Install button:
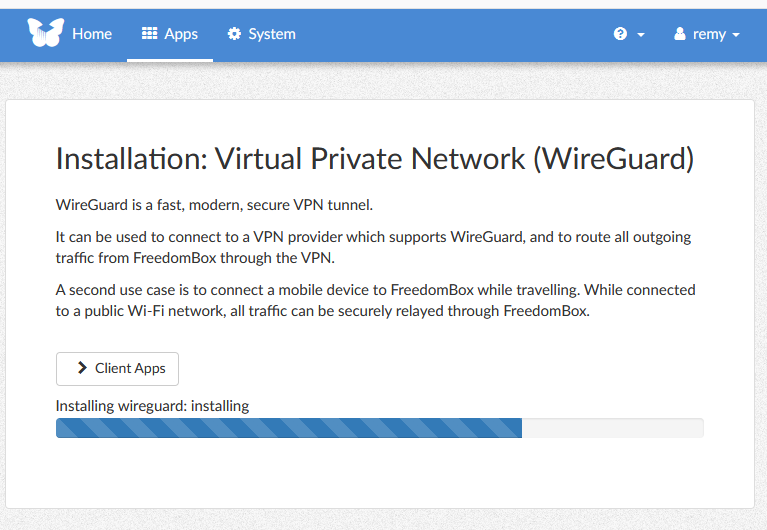
The installation should now start:
It does not take long to install wireguard, when the setup is finished the screen looks like the below image:
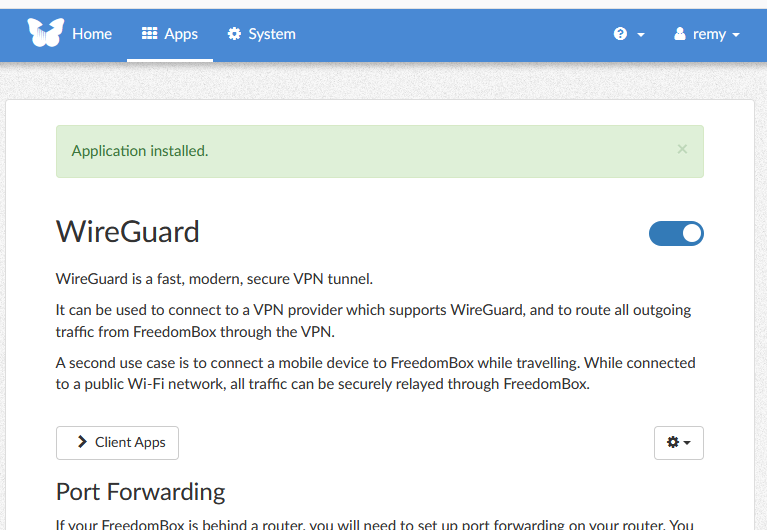
Wireguard pulls in a kernel module via DKMS so make sure you reboot after installing wireguard:
reboot
Otherwise, you will get errors in the log like below:
Failed to create WireGuard interface 'wg0' for 'WireGuard-Server-wg0':
Operation not supported
That's all there is to the installation.
There is one more step you need to do to get connected and that is to setup clients. Wireguard requires a client certificate, otherwise it won't allow connections. You generate a keypair for a client, then configure that client. This guide has an example for the official Wireguard android app/
Android
Installation and configuration on Android involves a bit of back and forth between the application and the webinterface. Both parties, the mobile and the server, need one anothers public keys, so be prepared to copy paste (or mail) a few strings here and there.
Install the Wireguard app from the play store or via F-Droid.
Open the application and start the configuration with the big blue + button.
Choose Create from scratch
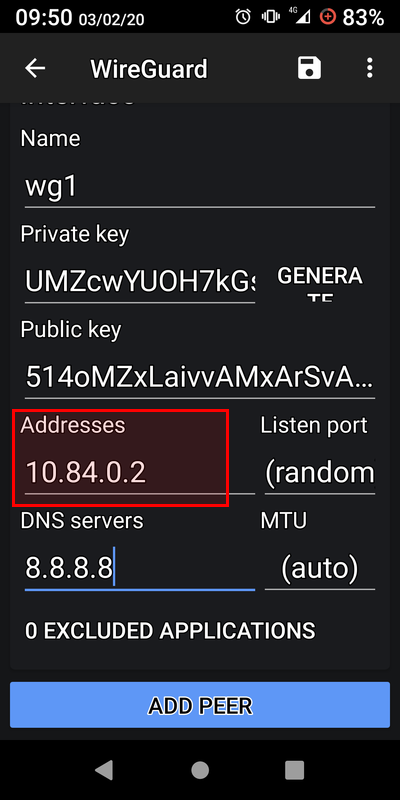
The first part, under Interface is all locally on your device. Enter a name and
click Generate for the private key. The public key is derived. Leave the address
and DNS fields empty for now.
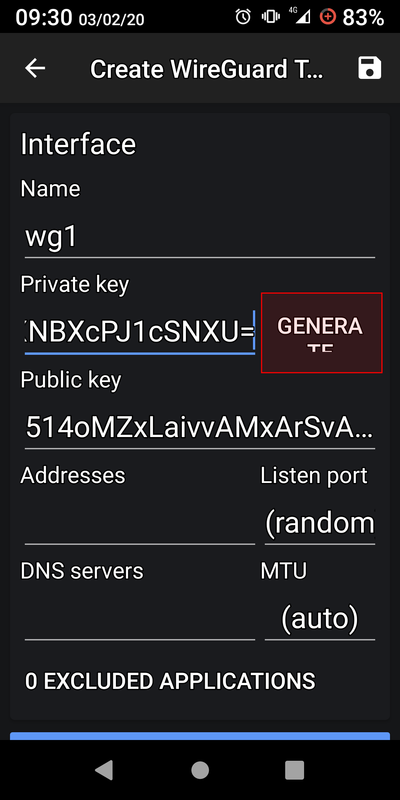
Save your public key and make sure you can copy-paste it on your computer.
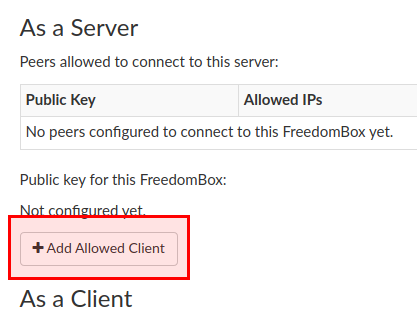
On the freedombox, click Add allowed client
Enter the public key generated on your phone:
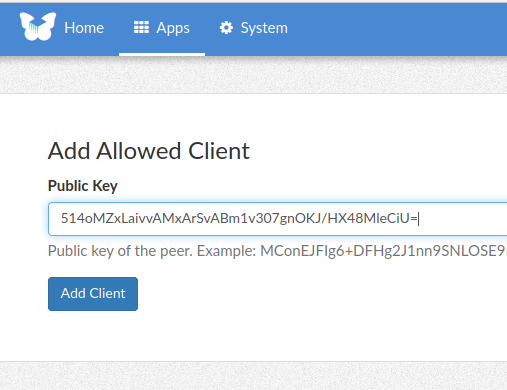
The server now gives you more information, namely the IP it will assign and the public key.
On Android, edit the configuration again and enter the IP address provided by the freedombox:
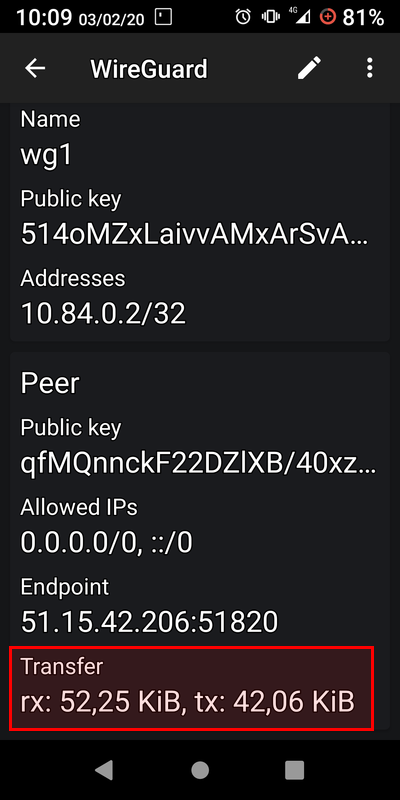
Save the configuration, edit it again and click the big blue Add peer button.
There you will fill in the configuration regarding the server.
Enter the servers public key and fill in it's IP or hostname under Endpoint,
including the port number, for example: 51.15.42.206:51820.
Under Allowed IP's enter the following:
0.0.0.0/0, ::/0
This will forward all traffic to the wireguard server.
Save and enable the connection. You should see an extra item Transfer in the list
which shows the amount of traffic via the VPN. If both rx and tx go up, the
VPN works. If only tx goes up, check if you rebooted your server after installing
wireguard. The kernel module might not be loaded and the network interface wg0
might not be there.
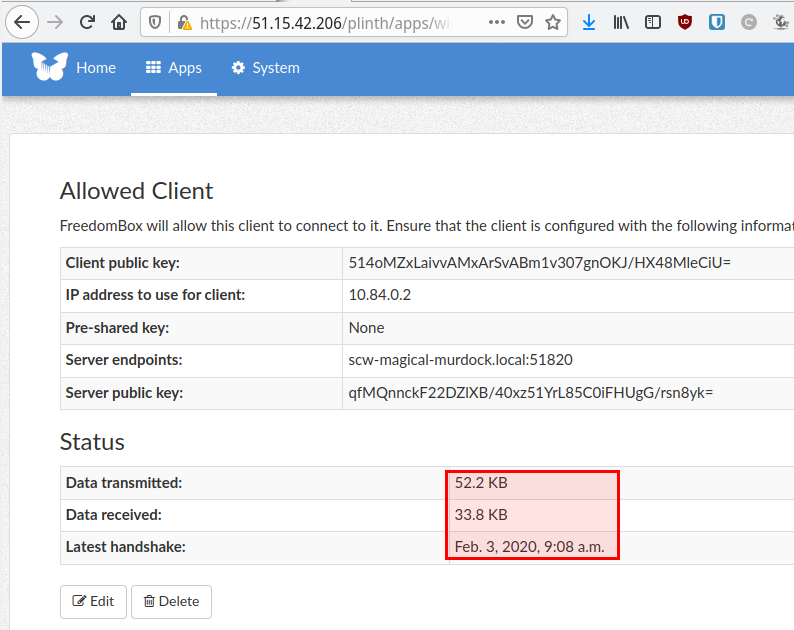
This is the server showing a successfull connection:
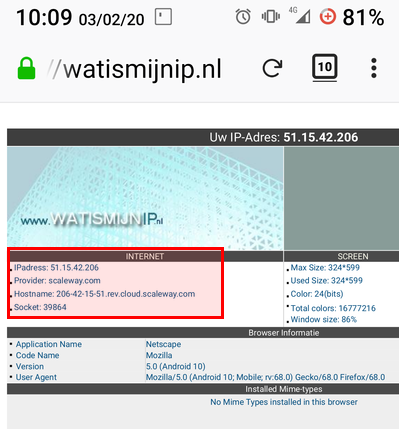
Here is an image of the browser on my mobile phone showing the external IP address of the VPN server:
Do note that all private keys and IP addresses shown in this article were only used for testing and are not active anymore.
Tags: debian , freedombox , ipsec , l2tp , linux , olimex , openswan , privacy , security , server , tutorials , vpn , wireguard