Raymii.org

Quis custodiet ipsos custodes?Home | About | All pages | Cluster Status | RSS Feed
Nitrokey gnuk firmware update via DFU
Published: 11-10-2016 | Author: Remy van Elst | Text only version of this article
❗ This post is over eight years old. It may no longer be up to date. Opinions may have changed.
Table of Contents
The Nitrokey (start) can be upgraded to a newer GNUK firmware. However, this can only be done via ST Link or DFU, if you use the Gnuk USB firmware upgrade you will brick the device. This guide shows you how to attach a DFU adapter and how to flash firmware to a Nitrokey, both for upgrading or unbricking an USB upgraded one.
Recently I removed all Google Ads from this site due to their invasive tracking, as well as Google Analytics. Please, if you found this content useful, consider a small donation using any of the options below. It means the world to me if you show your appreciation and you'll help pay the server costs:
GitHub Sponsorship
PCBWay referral link (You get $5, I get $20 after you've placed an order)
Digital Ocea referral link ($200 credit for 60 days. Spend $25 after your credit expires and I'll get $25!)
You need to build the gnuk firmware. The Device ID needs to be changed to
20a0:4211 in the file gnuk/USB_DEBVICE_ID:
$ cat GNUK_USB_DEVICE_ID
# VID:PID bcdDev  Product_STRING  Vendor_STRING
234b:0000 0200  Gnuk Token  Free Software Initiative of Japan
20a0:4211 0200  Nitrokey
##########<TAB> ##<TAB> ##########<TAB> #################
For the gnuk firmware compilation, please see this article. I will not
cover that here any further.
Requirements and connection
You do need the following:
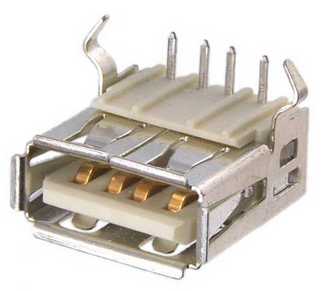
- USB header (like this, I hot-aired one of an old motherboard)
- Small bridge wire
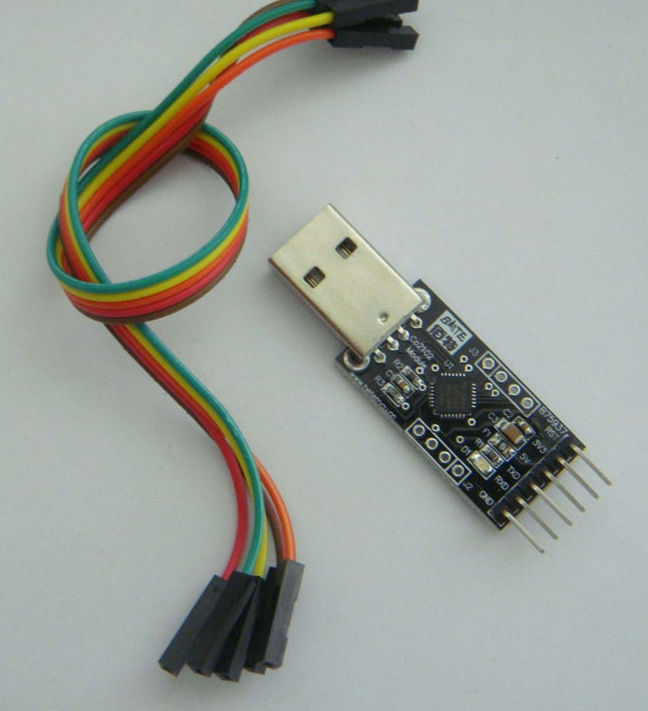
- USB to RS-232 serial adapter (like this)
- Small wires
- Caseless Nitrokey (note that you probably will break the case).
- stm32flash
DFU is a simple protocol via serial port which allows programming but no debugging. On the Nitrokey hardware the appropriate pins are exposed over the USB connector.
Connect the wires from the USB serial adapter to the USB header (Nitrokey USB Plug <-> Serial/TTL adapter):
- Pin 1, VCC <-> VCC (5v)
- Pin 2, D- <-> TX
- Pin 3, D+ <-> RX
- Pin 4, GND <-> GND
This diagram represents the pinout of the USB socket:
  ###################
  #                 #
  # ############### #
  #                 #
  #                 #
  ###################
     #   #   #   #
     #   #   #   #

     1   2   3   4
(This nice ascii art comes from the Nitrokey Pro Hardware repo.)
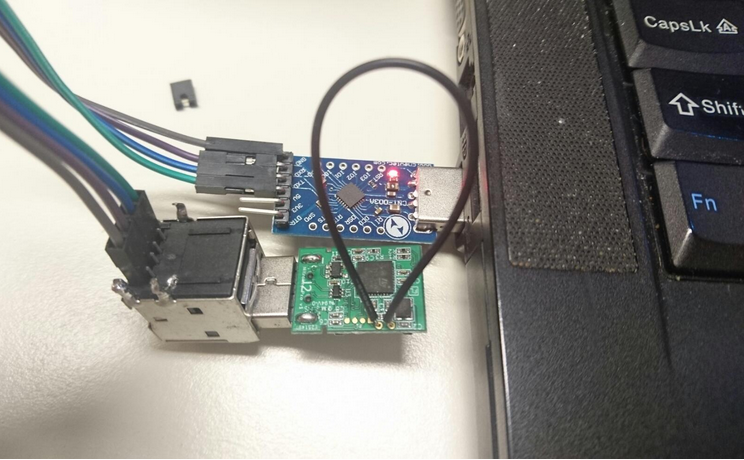
You also need a small wire to bridge the two holes before you attach the Nitrokey so that it boots into DFU mode.
Here is a picture of my setup:
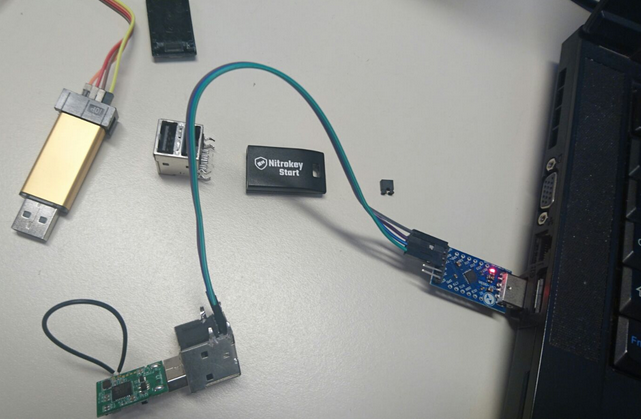
This was my complete workspace:
Unblocking the flash
The STM32 controller has a flash-protection bit which prohibits writing to the
flash. The stm32flash tool says it's able to unblock that, but for the
Nitrokey this fails:
sudo stm32flash -u /dev/ttyUSB0
Output:
stm32flash 0.5

http://stm32flash.sourceforge.net/

Interface serial_posix: 57600 8E1
Version      : 0x22
Option 1     : 0x00
Option 2     : 0x00
Device ID    : 0x0410 (STM32F10xxx Medium-density)
- RAM        : 20KiB  (512b reserved by bootloader)
- Flash      : 128KiB (size first sector: 4x1024)
- Option RAM : 16b
- System RAM : 2KiB
Write-unprotecting flash
Got NACK from device on command 0x73
Done.
So sadly I have to use Windows software, the ST Demo Loader. Download and install it and connect the DFU-Nitrokey to the Windows machine.
Update
This post on the mailinglist states that you could use the -k flag with
stm32flash to remove the read protection as well. It also states to not
forget to use the -j to read-protect the Nitrokey again after you're done
flashing if you intend to put real keys on there.
I tested this and it works, so you don't need the Windows tool in the end.
Scroll down for the Linux/stm32flash way.
End update
Also copy the compiled GNUK binary (gnuk/src/build/gnuk.bin) to the Windows
machine.
Flashing via Windows
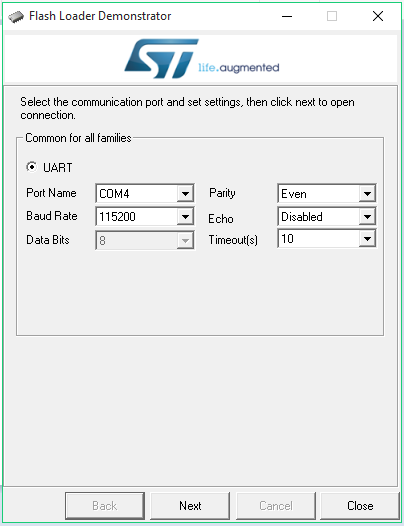
Start the utility up and select the correct COM port (COM4 for me):
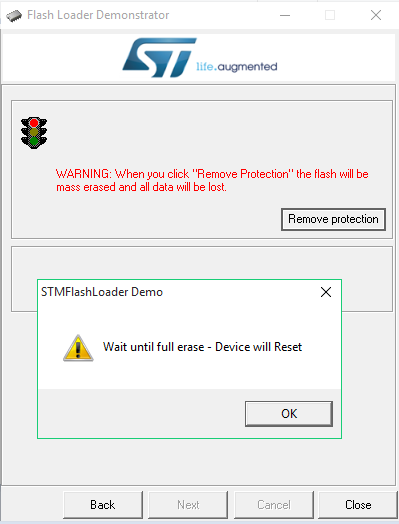
If the protection is set the tool will show a red traffic light and a Remove
Protection button. Click and complete that, then click next:
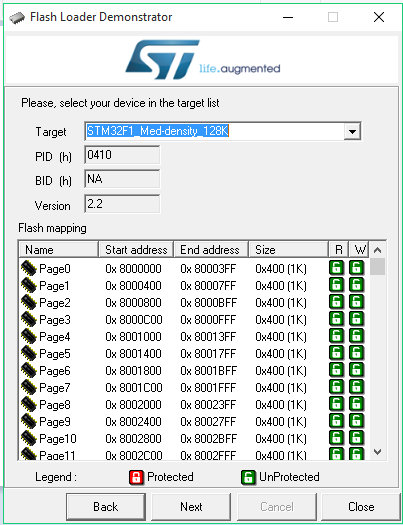
Click Next:
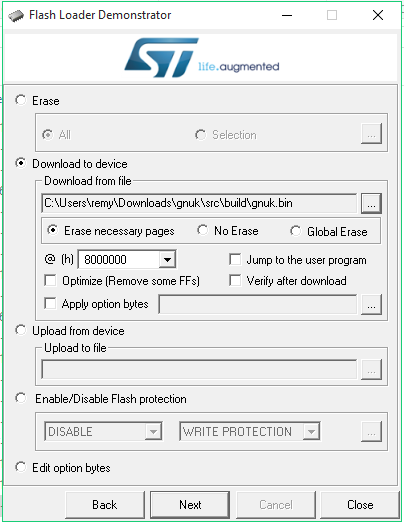
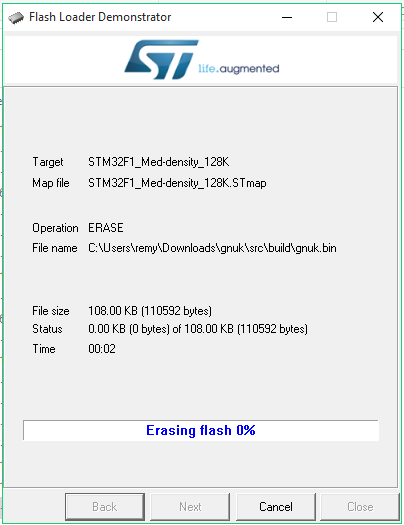
Select Download to device, Erase the necessary pages and choose the
gnuk.bin file:
It will erase the flash:
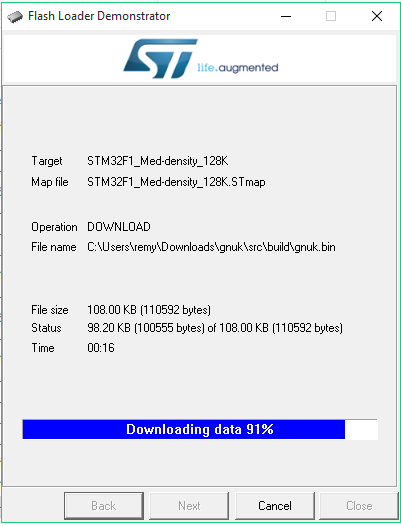
Then upload the firmware:
It will complete with a nice green bar:
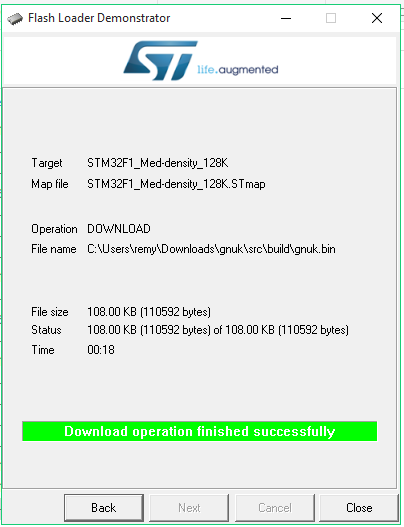
Now the binary is flashed and your Nitrokey should work. In my case, it sucessfully worked with gnuk 1.2:
$ gpg --card-status

Reader ...........: Nitrokey Nitrokey Start (FSIJ-1.2.1-87042430) 00 00
Application ID ...: D276000124010200FFFE870424300000
Version ..........: 2.0
Manufacturer .....: unmanaged S/N range
Serial number ....: 87042430
Name of cardholder: [not set]
Language prefs ...: [not set]
Sex ..............: unspecified
URL of public key : [not set]
Login data .......: [not set]
Signature PIN ....: forced
Key attributes ...: rsa2048 rsa2048 rsa2048
Max. PIN lengths .: 127 127 127
PIN retry counter : 3 3 3
Signature counter : 4
Signature key ....: 3D1B 8501 882B EA0D D813  6CAC 1437 62A5 87BD 54FE
      created ....: 2016-10-11 15:06:29
Encryption key....: 9898 208B 7876 4F65 A06E  3E65 637A 80D6 31D5 21C2
      created ....: 2016-10-11 15:06:29
Authentication key: 2141 3E30 8EFF F2D0 FB3D  4C9E DA3D F5B9 7130 1532
      created ....: 2016-10-11 15:06:29
General key info..: pub  rsa2048/0x143762A587BD54FE 2016-10-11 Remy test (Test gnuk1.2) <remy@test.nl>
sec>  rsa2048/0x143762A587BD54FE  created: 2016-10-11  expires: 2016-10-18
                                  card-no: FFFE 87042430
ssb>  rsa2048/0xDA3DF5B971301532  created: 2016-10-11  expires: 2016-10-18
                                  card-no: FFFE 87042430
ssb>  rsa2048/0x637A80D631D521C2  created: 2016-10-11  expires: 2016-10-18
                                  card-no: FFFE 87042430
An EC 25519 key can now also be used:
$ gpg --card-status

Reader ...........: Nitrokey Nitrokey Start (FSIJ-1.2.1-87042430) 00 00
Application ID ...: D276000124010200FFFE870424300000
Version ..........: 2.0
Manufacturer .....: unmanaged S/N range
Serial number ....: 87042430
Name of cardholder: [not set]
Language prefs ...: [not set]
Sex ..............: unspecified
URL of public key : [not set]
Login data .......: [not set]
Signature PIN ....: forced
Key attributes ...: ed25519 rsa2048 rsa2048
Max. PIN lengths .: 127 127 127
PIN retry counter : 3 3 3
Signature counter : 0
Signature key ....: 3678 F2EE 1CCB 4B24 B107  38BA 101D 491F 08E7 FD60
      created ....: 2016-10-11 15:31:27
Encryption key....: [none]
Authentication key: [none]
General key info..: pub  ed25519/0x101D491F08E7FD60 2016-10-11 test remy ecc (gnuk 1.2) <nitrokey@raymii.nl>
sec>  ed25519/0x101D491F08E7FD60  created: 2016-10-11  expires: 2016-10-18
                                  card-no: FFFE 87042430
Flashing via Linux
First remote the read protection bit from the device (Device should be in bootloader mode with the wire bridge for all these actions):
sudo stm32flash -k /dev/ttyUSB0
Output:
stm32flash 0.5

http://stm32flash.sourceforge.net/

Interface serial_posix: 57600 8E1
Version      : 0x22
Option 1     : 0x00
Option 2     : 0x00
Device ID    : 0x0410 (STM32F10xxx Medium-density)
- RAM        : 20KiB  (512b reserved by bootloader)
- Flash      : 128KiB (size first sector: 4x1024)
- Option RAM : 16b
- System RAM : 2KiB
Read-UnProtecting flash
Done.
Flash the binary and start it up after the flash:
sudo stm32flash -w build/gnuk.bin -g 0x0 /dev/ttyUSB0
Output:
stm32flash 0.5

http://stm32flash.sourceforge.net/

Using Parser : Raw BINARY
Interface serial_posix: 57600 8E1
Version      : 0x22
Option 1     : 0x00
Option 2     : 0x00
Device ID    : 0x0410 (STM32F10xxx Medium-density)
- RAM        : 20KiB  (512b reserved by bootloader)
- Flash      : 128KiB (size first sector: 4x1024)
- Option RAM : 16b
- System RAM : 2KiB
Write to memory
Erasing memory
Wrote address 0x0801b000 (100.00%) Done.

Starting execution at address 0x08000000... done.
Do set the read protection back on after flashing, otherwise your keys might
be exposed:
sudo stm32flash -j /dev/ttyUSB0
Output:
stm32flash 0.5

http://stm32flash.sourceforge.net/

Interface serial_posix: 57600 8E1
Version      : 0x22
Option 1     : 0x00
Option 2     : 0x00
Device ID    : 0x0410 (STM32F10xxx Medium-density)
- RAM        : 20KiB  (512b reserved by bootloader)
- Flash      : 128KiB (size first sector: 4x1024)
- Option RAM : 16b
- System RAM : 2KiB
Read-Protecting flash
Done.
NeuG on the Nitrokey Start
I did try to flash NeuG to the device, but that resulted in a blinking green LED and nothing else. Here's the command for reference.
sudo stm32flash -w ../../neug/src/build/neug.bin -g 0x0 /dev/ttyUSB0
Output:
stm32flash 0.5

http://stm32flash.sourceforge.net/

Using Parser : Raw BINARY
Interface serial_posix: 57600 8E1
Version      : 0x22
Option 1     : 0x00
Option 2     : 0x00
Device ID    : 0x0410 (STM32F10xxx Medium-density)
- RAM        : 20KiB  (512b reserved by bootloader)
- Flash      : 128KiB (size first sector: 4x1024)
- Option RAM : 16b
- System RAM : 2KiB
Write to memory
Erasing memory
Wrote address 0x08005c24 (100.00%) Done.

Starting execution at address 0x08000000... done.
NeuG does work on the FST-01.
Tags: fst-01 , gnuk , gnupg , gpg , neug , nitrokey , nitrokey-start , start , stm32f103tb , tutorials